I'm not a fan of disposable cleaning wipes. They score major points for convenience factor, but not so much for eco-friendly factor, or cost-per-use factor. When we put our new hardwood floors in last summer, I dug my Swiffer back out of the basement along with a partial box of the pad/cover thingys that came with it. I was kind of terrified by the fact that the scent in the dry pads was still as strong as the day I bought them. I didn't feel like it was something I wanted to be pushing around my new floors, or introducing to my dogs' digestive systems. So I made my own. It doesn't have any chemicals in it, it works just as well (if not even better) at trapping dust and dog hair, and I can use it over and over again because it's completely machine washable.
Here's what you need to make your own:
~A microfiber towel (I've also made one with fleece, and it works fine also).
~An old t-shirt (any fabric that has a lot of stretch in at least one direction will do).
~Scissors or a cutting mat and rotary cutting wheel.
~Basic sewing machine
~About 15 minutes
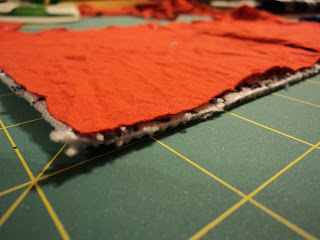
Place your Swiffer down on the towel and cut around it, leaving about a 1/2 inch extra on each edge for seam-allowance.
Using the rectangle you just cut out of the towel, place it on your old t-shirt and use it as a template to cut the same shape out of the t-shirt. Make sure that your rectangle follows the stretchy part of the t-shirt fabric, meaning you should be able to stretch the rectangle you cut from the t-shirt into a much longer and skinnier rectangle. Fold the rectangle you cut out of the t-shirt in half and cut it on the fold, leaving you with 2 squares of t-shirt fabric.
Place your two t-shirt squares on top of the wrong side of the towel fabric (If you're using a towel with a pattern on it. Otherwise it doesn't matter).
Run it all through the sewing machine with a 1/2 inch seam allowance all the way around. back stitch a couple of times where the two t-shirt squares meet in the middle. This makes a stronger seam where it's going to have the most tugging and pulling on it to get it on your Swiffer.
Turn it all right-side-out again.
You should end up with something that looks like this. Slide one side of your Swiffer into the cover. Now stretch it with all your might to get it on the other side. This is why I did those back-stitched seams. If I was going to do this all over again, I might have tried it with shorter pieces of t-shirt fabric, as to not have to stretch it so hard to get it on. But it makes a nice tight cover that doesn't get stuff stuck under it while pushing it around. So I'm happy enough with it.
You should end up with something that looks like this...
...And this.
Have a wicked fun time using your new eco-friendlier Swiffer cover!
Thanks for stopping by,
-Lindsey


I totally LOVE this idea!!! I will have to try to make one soon after vacation. Have you thought about a mop-head version? HMP
ReplyDeleteI wish I would have come across this blog sooner. I just purchased a Rubbermaid Reveal to replace my Swiffer.
ReplyDeleteawwww...bummer. well, if my Google search brought me to the correct product, it appears as though you could make a similar cover for your new Rubbermaid thingy. You may have to modify the dimensions slightly, but the same pattern principles still apply. Just leave a 1/2 inch seam allowance all the way around, and off you go!
DeleteI am so in love with this idea... Thank you for it. Im also no a fan of the cost and non eco~friendliness that is associated with the swifer and have been in search for something reusable ... I will be breaking out the sewing machine this weekend
ReplyDelete